Pin It
I knew I wanted to showcase this beautiful sentiment from the WTG-My How You've Grown set.
As my boys grow bigger and older, this has such a deeper meaning. I stamped it up on the POLKA DOT GREETINGS FRAME DIE-NAMICS. Adding personalization to the frame was easy to do thanks to the TYPEWRITER ALPHABET. I stamped the lower case letters from the set onto a few of the MINI PENNANTS DIE-NAMICS.
This frame is then mounted on a burlap Chipboard LAYERED HEART DIE-NAMICS (I used the smaller heart to fit the size of my frame and not hide the letters in the background, so much).
Here's another shot of some of the dimension and texture I added with the burlap, chipboard, and buttons.
I thought I'd also share how I pulled this frame together. With a few simple supplies, it is easy and will leave you with beautiful results.
2. I cut two hearts, one out of chipboard and one from burlap using the LAYERED HEART DIE-NAMICS. I used a coating of Modge Podge on the chipboard to adhere the burlap. This kept any adhesive from peeking through the burlap, once it was dry.
3. My frame was a cheap, dollar find from Micheal's (I didn't care that it had a slot for a photo, it was going to be covered up. I rounded the corners of my Vanilla Textured cs to match the corners of my frame.
4. I used Acrylic Paint and some Re-inker (SU Soft Suede) to paint up my frame. A few drops of the ink, until you have the desired color and your paint is ready to go.
5. Paint your frame around the edges and on the sides. Make sure you are covering any exposed parts. I didn't bother painting the inside, since it was going to be covered by cardstock.
7. I added a subtle scored frame to the center of my cardstock base to use as a guide for my alphabet letters. A scor-pal comes in handy for this.
Here's the finished frame, again. Pretty cute, huh?
I also made a coordinating card to add to the box before I ship it off. I had a PI, just for the job. This one is BOY AND BABY. With the help of Karen's Sweet Sunday sketch.....I completed this one in no time. I used the same colors from the frame and added a few more Die-namics to finish the card. The hearts are my FAVE from HOMESPUN BIRDHOUSE and the sentiment is the BRACKET TAB DIE-NAMICS. I even impressed some letters to the background to mimic the letters I used in the frame.
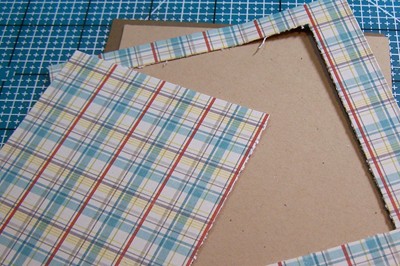
This card is larger than normal, it's a 5 inch square. It just about killed me to use a full 4.5inch square of that gorgeous plaid print from the new My Mind's Eye paper pack, Dilly Dally. Then I remembered an old scrapbook trick.....since most of the panel was going to be covered up, I went ahead and cut out a middle section of the pattern paper. It helps take out some weight (great when mailing cards) AND it allows me to use more of that print for another project.


You have been busy! I love all the color in the letters on your baby project - it's just darling! And you card is too cute! I really like that it's a little boy holding the sweet little bundle of joy. Big brother! :)
ReplyDeleteA darling project.....such a neat idea...and I love all those letters, now I want those letter dies...sigh!!
ReplyDeleteThat alphabet background is perfect, Lisa and I love the coordinating card!!
ReplyDeletegreat baby gift, thanks for the tutorial!
ReplyDeleteThis project totally rocks, what a gorgeous baby gift!
ReplyDeleteAwesome project Lisa!
ReplyDeleteThis is AWESOME LIsa! I LOVE how you focused on that gorgeous quote!!
ReplyDeleteSo cute! The frame is such a creative project. The letters just pop!
ReplyDeleteOHHHH! TOTALLY amazing! I LOVE the letters and the papers you used on the first project---and that second card....just precious:) LOVE!
ReplyDeleteThis just the cutest, Lisa! Love the framed baby project with the alphas, burlap heart and sweet quote! The coordinating card is darling, too!
ReplyDeleteOH my SINKIN goodness- love the alpha on the card and the sweet little guy holding a baby- they just blow me away!! Love them!
ReplyDelete