It's time, it's time!!! How fantastic has the past week been? I sure hope you've had as much fun as I have. If you haven't shopped yet, here is the BRAND SPANKIN' NEW link to the MFT Boutique.
BUT before you go....you might want to make sure you stick around and make your way through this New product Tour. There is a secret Blog Candy (a $50 MFT Gift Voucher!!!) up for grabs. It is hidden on one of the DT Blogs......leave comments along the way for your chance to win. The more Blogs you visit, the better your chances of winning!
Here are my projects for tonight's hop. I get to show off the fantastic ALM-Big Birthday Numbers stamp set. It's such a cool set and has sooooo many uses. Those giant numbers are perfect for paper piecing, coloring, or just plain 'ol Stamping!!! ♥♥♥ Love it!
Let me show you!
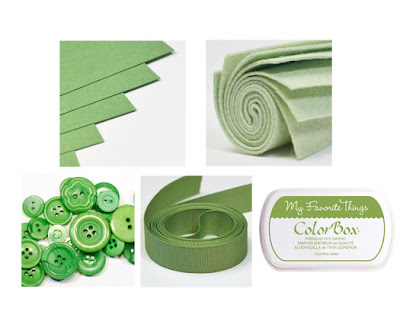
First up is a festive, girly card, complete with a banner AND party hats!! I used a Mojo Monday sketch....loved the circles. They were easy to cut with the the Circle Stax 1 & 2 Die-namics. I picked out a few different patterns from the Crate Paper-Party Day. I was so excited to use these papers with this set. The new GUMDROP GREEN INK looks great with them.
Plus the party hat print was a great fit with the PARTY HAT BORDER. I used it along the bottom and topped the pom poms with some Stickles Glitter.
The top circle was a fun place to tuck in a bit of the PARTY BANNER BORDER DIE-NAMICS. I love that there is a gentle curve to this die, and the fun shape of the banners look great with anything! I topped the banner with a bit of Hemp Twine.
Now let's check out the awesome BIG BIRTHDAY NUMBERS. I am getting a jump on my niece and nephew's birthday cards. This one is for my sweet niece. I still can't believe she is turning 13 this year. WOW!
The numbers are large enough to cut out quickly. I stamped them in GumDrop Green Ink and then cut them out. I went ahead and sponged on some distress ink around the edges to help them pop against the same paper. I also added the word happy to the no.1. It just fit perfectly there.
While this set was created to go with the à la mode, Birthday Wishes stamp set, of course it can be used with ANY stamp set or on it's own. It's so much fun. I did stamp the pretty à la mode on the inside and added another matching BIRTHDAY BANNER BORDER. One more circle with the Happy Birthday sentiment finished off the inside.
The numbers look great with the new Doodle Garden stamp set, PARTY GIRL! I stamped her onto x-press blending cs with my Momento Black ink pad. I used BOTH my Copic and Prismacolored pencils. I'm stretching my creativity, lately.
Her skin was all colored with Copics. I love the smooth, clean blending look of the Copics with skin tones. Then reached for my colored pencils for all other coloring. Here are the colors I used.
I loved the party girl feel, so I cut the gorgeous High Tea Doily and tucked it behind my Party Girl. I also went ahead and added a few party hats with the PARTY HAT BORDER. I love that you can customize each of the pieces with different colors. I added a few rhinestones to the tops.
Here is the number I added. One of my other nieces is turning 9, so I cut out that number and topped it with a matching Blue Raspberry button. How cool is that you can customize any birthday or anniversary with these awesome numbers!!!
How about one more??? I can't leave out the boys, now can I? I created this collage, grunge, boy card pretty quickly. I even used the same paper pack by Crate Paper-party day. I also used MFT card stock in Kraft, Lemon Drop, Tangy Orange, and Black Licorice. I ♥ my MFT card stock!
I used the awesome Black Licorice ink to stamp my numbers (yep, my nephew will be 11 in a few months! told you I'm getting a head start on birthday cards!). I used my W-3 Copic to add some shading to the numbers. I love how it looks on the Kraft cs. I stamped the word "rocks" with the new GUMDROP GREEN INK and tucked in a few starts here and there from LOLLIPOP ADDITONS-BIRTHDAY.
I grundged up the card front a bit more with a few splatters of ink. I love all the fun Mists and sprays that are out in the market right now. BUT I am not a fan of how little control you have when using them. I find that I just make a big mess or a huge BLOB when I use them. So I have a trick that I learned on the CAS Online class I took last month.
- I grabbed my MFT Kraft re-fill, a small color pallet/tray, my water mister, and a small paint brush. I added a few drop of re-inker to one of my wells.
- Then I sprayed in a little bit of water to mute out the color (You don't need to do this step, if you'd like to leave it out).
- Then pick up the ink on the tip of your paint brush. After you have some ink on your brush, I just tap it gently on my card front. I tap the brush on my finger and the ink just drops onto your card stock. I feel like I have way more control this way.
You can make your own colored mist in any of the MFT colors this way. If you use more re-inker and add it to the Mister Bottle you can have your own spray, too. So don't forget to pick up your re-fills when you order your MFT Ink Pads.
I used to wait until my pads got dry to order my re-inkers, but then I'd be mad because I couldn't use my ink pad. It's worth the extra few dollars on your order to have it all right when you need/want it! Plus there are so many ways to use that yummy ink!
and I did up the Inside to match. Gives me another reason to use more cute stamps on a card!
Okay....I know it's been a long post, but I hope you enjoyed it. I love showing all the versatility of one stamp set. These à la mode-Big Birthday Numbers are a Must Have!
Hop on over to the MFT Blog for the rest of the New Product tour Line up!
Here is a closer look at all the NEW MFT products you can Order NOW!!
Here are the links to all the MFT product I used today! Click them now to shop!