Showing posts with label crazy for christmas. Show all posts

Thursday, November 17, 2016

Reverse Confetti-Crazy For Christmas

Hello! I hope you have enjoyed the past few days with the Reverse Confetti crew and all our holiday goodie ideas. We have one more post for you today and we are focusing on home decor. 


I love my little holiday pillow I made. I am far from a seamstress, but I had fun making this project. It required a little sewing, some felt, a couple of Reverse Confetti Confetti Cuts, liquid adhesive, and some polyfill. It's a little knick knack pillow to set on a shelf or mantel. I enjoy clustering little holiday decor pieces and this will fit in nicely with what I already have on hand. It is approximately 4x6 in size. 


I cut two pieces of the linen fabric and sewed together three of the sides, inside out. I continued to sew up the fourth side but left an opening to add the polyfill. I then flipped the fabric right side out and filled it up with polyfil. I had no idea how to sew that hole close, so I simply used some scor-tape to secure the opening shut. It's fine, the pillow is just sitting on a mantel. You can't even tell. I then cut three of the "merry" from Winter Word Coordinates


While I love the newest Snowflake Trio Confetti Cuts, I just adore the Let It Snow flakes. The shape is so fun. I used liquid adhesive to adhere all the felt pieces and then added a dolop of glue to the snowflake centers and dropped in a few clear seadbeads for a sparkly touch!  Here is a close up. 


Some more of the RC Confetti Crew have their own home decor projects to share today.
Come check it out.
 

Diane Jaquay

Leigh Penner

Amy Rohl

Jeanne Jachna

Heather Hoffman

Heather Pulvirenti

Lisa Henke

Amy Sheffer

Susan Liles

Melissa Phillips


Have a beautiful day!


Photobucket

Thursday, November 12, 2015

Reverse Confetti Crazy for Christmas-Memory Keeping

I am back with the third day of the Reverse Confetti Crazy for Christmas holiday showcase. I hope you have been following along the past two days. If not you can find all the posts linked up over on the Reverse Confetti Blog. There are lots of creative ways to use the wonderful RC products for parties and gift giving. 


Today we are focusing on memory keeping. I love to make ornaments with my boys school pictures. I don't know about you, but I always have a lot of extras of the wallet size, so this project is a great way to use those up.  I have done this in years past, so I like to make sure they are different from year to year. The fun new Gift Card Holder Tag Confetti Cut was the perfect size to frame up by handsome boys. 

Like with all group projects I create, I pick a color combo and stick with, changing it up for each ornament, but keeping it the same. It helps keep the look uniform. I used two colors of green with a tropical teal and white. Below each ornament I will list the products I used.


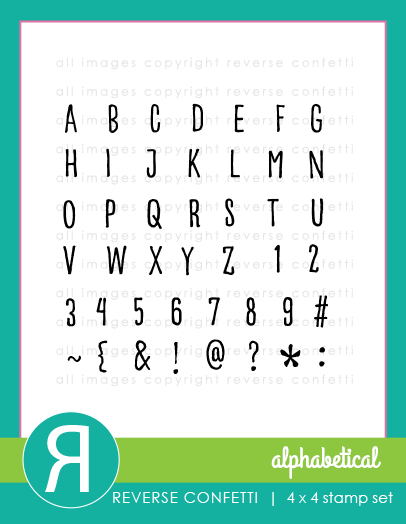
 Here is a close up of the cluster of dies I used. I really enjoy creating customized embellishments. The Alphabetical stamps fit so nicely on the Tag Me banner piece. 


My middle guy is up next. I used the same frame but dressed it up with polka dots and the holly leaves. 


Here is the close up of the holly leaves. How great is that touch of glitter?? I think it will look great on my tree.  


My final ornament is of my youngest. I used the skinnier stripes from So Stripey on his. He was super excited to see this tree on his ornament. I love how it turned out, too. 


Here is the group shot again. I love them, but then I might be biased, they are of my sweet boys.  I am blessed!


 You can recreate these easily. It really took me no time to make them. Once I picked my colors and had the general layout of each ornament, it came together quickly. These also make great gifts for the grand parents! 

Now join me to check out what some of my 
fellow DT members created for today's showcase. 
I know they will not disappoint.


Thanks so much for stopping by today. I always look forward to your kind words. Have a great day!

Photobucket

Tuesday, November 10, 2015

Reverse Confetti Crazy for Christmas-Parties


It's beginning to look a lot like Christmas......everywhere you go!! Isn't that the truth! I Hope you are ready for a TON of holiday inspiration from the Confetti Crew and the Reverse Confetti  Crazy For Christmas special showcase. Today we are focusing on the parties! I decided to make some darling Party Favors, that could also double as a hostess gift to any of the holiday parties you'll be attending this season. 

I started with the Frosted Pillow Boxes and added some pretty tags and a fun handmade ornament to top them off. Let's take a closer look. 

First up is my Santa party favor. I filled each box with a little something different to give you a few different ideas of what you could add to the favor boxes. Really,  you can add anything you'd like to the Frosted Pillow Boxes. This one is filled with yummy cocoa roasted almonds. I tied on some pretty ribbon and then added my clothes pin Santa ornament. 


I got this idea from an Essential Oils group I am in. They used these for a Halloween Party favor and I adapted it to Christmas. I found a pack of printed clothes pins in the dollar bin from Target. I used two of the polka dotted ones and then a solid black one. To that I added a strip of washi tape to add a fun design and to tie in a red color to my favor trio. Washi Tape is a great way to dress up a plain clothes pin, too. Simply remove the metal clip, add the washi tape to the top of the clothes pin and then carefully put the clothes pin back together.

 To really add a WOW factor to these ornaments, you can add some Peppermint essential oil to the back of the clothes pin for a scented treat!


I colored up the Jolly Holiday Santa with Copics and then cut it out with the coordinating Jolly Holiday Confetti Cuts

I created the sentiment tag with the fishtail banner piece from Stitched Flag Trio and Seasonal Sentiments. I added a sweet little Hang Ups topper to the tag. I added in a green brad to add an additional pop of color. 

I created a very similar ornament with the deer image from Jolly Holiday. I used the same products to make the sentiment tag, too. This time, to the inside of the frosted pillow box I added some dark chocolate covered almonds. YUM! 

I just love this little guy. I colored him up with Copics and then added some crystal effects to his nose. Here is a close up. 


I changed things up a little bit with my third favor box. This time I filled it with some red and green M&M. For my ornament, I stamped and cut the Merry & Bright Christmas Bulb. I tied on some silver twine and added it to the clothes pin with some foam dimensionals. 


I used the Stitched Flag Trio and Hang Ups on my tag, but this time I used the just released With Love sentiment set and Alphabetical stamp set. 


Here are the ornaments by themselves. I just love them and think they will be adorable clipped to a Christmas tree. A little bit of hand made Christmas at it's best. 


and I thought you'd like to see how they work on a tree (I used a branch here, but it gives you the idea). I am looking forward to giving these out this year. 


Thanks so much for hanging with me today! Looking for more holiday inspiration?
Check out what this talented crew has created for you. 


More Crazy for Christmas fun coming tomorrow! 
I'll be back on Thursday with another project for you. 


Photobucket