Wednesday, October 14, 2015

Happy Fall-idays Thanksgiving with Reverse Confetti


Welcome back! It's the second day of our Happy Fall-idays Showcase with Reverse Confetti. Today we are sharing some ideas and inspiration for Thanksgiving. If you missed yesterday's showcase, we were featuring Halloween projects. Check it out. Tomorrow we will be focusing on Christmas (stop by the RC blog for the full list of DT members). 

Today I thought about sharing a simple hostess gift, or even a little gift to hand out to your dinner guests this year. First things, first.....I kept it waaaay simple. No one has time to add a super detailed, time consuming project to their to-do list. So quick and easy is my motto.  I had these muslin bags in my stash and I knew they would make sweet little treat sacs. I filled them with some white chocolate M&M's, but dinner mints would be great too. 

This first one is a larger size bag and I simply die cut the Leafy Confetti Cuts with some green felt and then cut out the word "thankful" from the Thankful Pretty Panel in a deep pretty red felt. **TIP** because the word is so intricate and delicate, especially once you cut it from felt, go ahead and cut a paper version of it, too. I used the same color card stock so it was a hidden layer but still adds some stability. Glue the felt piece on top of the paper piece. Then go ahead and trim out the word from the frame.** This made the die cut piece so much easier to handle.

I love that I did not have to sew on this project. I simply glued on the felt pieces (put a scrap piece of paper inside the bag while gluing just to make certain you don't glue the bag shut). I finished it off with some ribbon, a matching button, and some of the yummy new solid twine in Natural

I also have a smaller size of this same muslin sac, and I wanted to show you a different version incase you didn't have any felt. Here I used the Pumpkin Patch stamps and Pumpkin Patch Confetti Cuts to create a paper embellishment for the sac. Works just as well. I used some scor-tape to adhere the pumpkin and all it's elements. 

Behind it, I wanted a little something extra, so before I adhered the pumpkin, I actually stamped directly on the bag with Whole Lotta Dots. Again, be sure to place a scrap piece of paper on the inside of the bag, this time so the ink doesn't bleed through to the other side.I tied it up with some Cappacinno twine

Here is another look at the pair of treat sacs together. 


I think they turned out super cute. Now I just need to crank out about 10 more and surprise my family on Thanksgiving. 

Here is the list of the DT members that are sharing today. You won't want to miss it!

Reverse Confetti Blog


Thanks again for hanging out with me today. I hope you are inspired to create something handmade and special for your holidays this year. 


Photobucket

Tuesday, October 13, 2015

Happy Fall-idays-Halloween with Reverse Confetti


The confetti crew is so excited about this fun showcase we are sharing this week. We have three fun-filled days showcasing all the things you can create with your Reverse Confetti products, giving you lots of inspiration and  ideas for the upcoming holidays. Let's go!

My project all started with that striped jack o' lantern tin fro the Dollar bin at Target. I popped that in my cart and the wheels started spinning. Getting Boo'd is BIG in our neighborhood. If you don't know what it is, let me try to explain. It is a surprise little gift you leave on a neighbor's door and then they in turn pass it on, and go Boo someone else. You hang a little picture in your window to let everyone else know you have already been Boo'd! The boys love it! So for my project I created a handmade Boo Bucket. Here is everything I put inside the tin. 


I went online and Googled Booed. Lots of images came up with examples of the letter and image you include in the bucket to explain how it all works. I printed these off, trimmed them down and distressed the edges a bit. I also added a little black ink around the edges. I rolled up the papers and tied on a Trick or Treat tag. I cut the polka dotted paper with the Tag Me Confetti Cut, added a black raven from Cast a Spell Confetti Cuts and tied it all on with some of that yummy Charcoal solid twine, Jen just added to the shop. 

I had to add some candy! I found a back of mini Kit Kat bard and they fit perfectly folded up with the Folded Tag die. I did have to add a small glue dot to the inside of the flap to keep it closed. I topped it with the banner from Tag Me and stamped a sentiment from Spooky Sentiments in orange. I also added the adorable spidey from Too Cute to Spook and more of the charcoal twine. I unraveled the ends for more texture and interest. 


It's hard to see in this photo, but I filled one of the new Frosted Pillow Boxes. I love these. You can fill it with so many different things! Today I chose some candy corn M&M's. I wrapped a polka dotted doily around it and then tied on the stitched ribbon. I embellished this one with an orange moon (Circle 'n Scallops Confetti Cuts) and the word die from the Treat Tote. I added my favorite bat from Too Cute To Spook. He's adorbs!


Here is the back side. I love that you can see what's inside through the frosted box


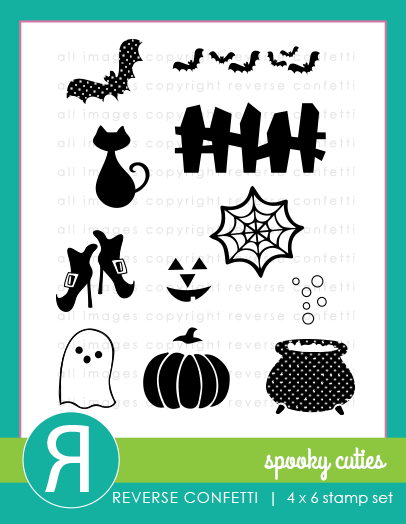
My kids think soda is a great treat. I grabbed a can of non-caffeinated Orange Crush and wrapped it with some polka dotted designer paper from my stash. I trimmed it to size and secured it with some scor-tape. I tied on purple stitched ribbon and added a Square Tag. I stamped some great images from Spooky Sentiments and Spooky Cuties. This would be super easy to do if you were serving soda's at a Halloween party, or just as part of a goody bag. Love it!

The final touches to my Boo Bucket is the paper straws with the sentiment flags. I just think these are so festive to add to any gift bag, or gift box.  I stamped the word "boo" with the Lighthearted Letters stamp set. The other one I used the spider web and sentiment from Too Cute to Spook. I cut them with the one of the Stitched Flag Trio dies and added a bit of Star Garland to them. Scor-tape works great here, too for adhering them to the tops of my straws. 


Here is another look at the completed Boo Bucket. You really can add anything to it. Grab a couple things, add some handmade touches to it, and BAM! It's super cute. 


Here is the list of crew members that created some Halloween treats for you!
Don't miss a single one of them. 
They rock!


Come back tomorrow. We are showcasing Thanksgiving!

Photobucket

Sunday, October 11, 2015

Sweet Sunday Sketch 290 {joy to the world}

It's been a beautiful fall weekend here in the Midwest. I am thankful the rain has held off, especially since we have a new puppy. It sure makes house breaking a little easier. We have spent a lot of time outside with the new boy. 

 I am back with another card for the newest Sweet Sunday Sketch Challenge. It's a nice simple sketch with  loads of possibilities. I was still in holiday mode from the Reverse Confetti October Release, so I used some of those goodies on my card today. 

I just adore those quick card panels. This one is from Tis' The Season QCP and I stamped a holiday greeting from Winter Word Coordinates. I then cut out the word "joy" from Winter Words Confetti Cuts and added the large wreath from the Wreaths dies. I added a touch of color to the Joy die cut with some simple ink blending. 


Here is the sketch. 


Hop on over to the Sweet Sunday Sketch Blog for all the challenge details, more inspiration from the fabulous DT and of course the linky!


Thanks for stopping by. Have a wonderful day. 


Photobucket