Wednesday, February 29, 2012

WSC-Flying By

**Please scroll down for my TEASER post**


I'm back with my second post for today. It's Wednesday, so that means we have our weekly sketch challenge for you.  The layers are fun to work with on this sketch.  I think I'm going to play with this one again.  For now, I used the YOU MOVE ME stamps and Die-namics to pull together a sweet boy birthday card.
I used some of the Oct. Afternoon papers and a whole row of clouds for the long skinny border.  I combined the small puff of cloud/smoke from the You Move Me set and the smallest CLOUD TRIO Die-namics and stitched them on with a zig zag stitch. The cardstock is fossil and Jelly Bean Green.

Here is this week's sketch.
As always, we hope you 'll join in on the fun.  There is a gift certificate up for grabs....just be sure to upload your creation to the SCS Gallery with the proper keyword.

Check out Kim's blog for the DT line-up with this week's sketch.

See you back here tomorrow....more Teasers on it's way!


Pin It 

Photobucket

MFT March Teasers!

Another month has flown by and now we are BACK with the next round of Teaser Posts! Yes!!! it's time for the MFT March Release.  We're ringing in Spring in STYLE!!!
Before I jump in with today's teaser.....let's get you In The know!

Here are the details about the upcoming release on March 6th at 10 PM EST:

  • You can attend the New Release Party on March 6th from 8-10 PM EST HERE in the MFT forum, where you can enjoy fun, games, and PRIZES!
  • The MFT release, including all new stamp sets and Die-namics, is on March 6th at 10 PM EST.  You'll find all the newest products HERE at release time.
  • The guest designer contest is ON!  Check out the forum for details on how YOU can win $200 in stamp sets and Die-namics, and play along with the MFT Design Team for a month.
  • If you'd like to see all the teasers for today, please click on over to the MFT Blog NOW.  Be sure to leave comments as you go for the chance to win one of 2, $10 gift certificates given away daily.  The winners will be posted on March 6th just before the release party, on the MFT blog.
We are kicking off this month's teaser posts with the latest and greatest WTG stamp: PUDDLE JUMPER!    You're gonna love her.


I did her up with LOTS of details and LOTS of FABULOUS Die-namics. I sure had fun creating this card.  I pulled out some older Echo Park papers....For the Record. I just loved the yellow gingham print and knew it was a great fit for her  rain coat.  

Check out that cool, scallop corner....it's a NEW Die-namics....it's part of a  set of 6  Die-namics called PHOTO CORNERS.  They are sooo cool and add the perfect "little something" to any project!
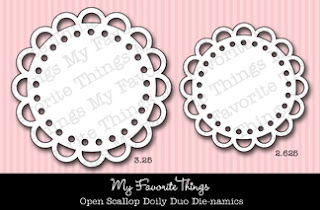
I added the gorgeous and fun OPEN SCALLOP DOILY DUO DIE-NAMICS behind the main image.  After I colored and paper pieced the Puddle Jumper girl, I added a few brads and lots of Crystal Effects.  I started with just the puddle, then I decided I wanted to give that plasticy-rubber look to her coat and wellies! 
You can  also see the next addition to the Monarch Border Die-namics....this one is the new, MINI MONARCH BORDER. I think this is my favorite size of the three.  I cut two borders from Black Licorice cardstock....did you see??? LOTS of lovely cardstock and matching ribbons are now in the boutique.  
I stamped the sentiment onto a FIRST PLACE AWARD RIBBON DIE-NAMICS flag and added it to some Puff White cloud felt clouds and the SUNSHINE DIE-NAMICS.  Those are finished off with a matching yellow button and some MFT Charcoal TWINE.
Now hop on over to Kim's Blog....she has the deatils on today's teasers and the full DT line up for today!
Here are the newest Die-namics graphics. 


and the following Die-namics are already in the boutique...
click on the graphic to purchase!


Pin It

Photobucket

Tuesday, February 28, 2012

TSG-Hi Sweets


I HAD to HAVE this stamp set.
I have resisted it, since it came out and 
have put it in my shopping cart at least 6 times.
I finally hit the submit button last week. 
Ahhhh! There She Goes stamps....
forgot how fun they are to work with. 

Perk Up. arrived in my box yesterday and I
inked it up right away. 
I used Jen's Deconstructing sketch no.40 for this one 
and the gorgeous My Minds Eye papers (on the bright side).
I bought this set for THIS sweet mustache face. 
Something about it, just makes me giggle inside when I see it. 
I paired the mug up with a sugared doughnut 
and tied the whole thing up with some Twine!

This one's also for the Ribbon Carousel: Anything goes challenge
Makes it super easy!
Love my twine!

Pin It
Photobucket

Creative Chat-Ribbon Storage

It's time for the MFT Creative Chat. The My Favorite Things Design Team Creative Chat is a monthly feature, where we are challenged to explore our creative spaces and share valuable organizational methods, tools, and shopping strategies with you. You'll be able to peek into our creative spaces, ask questions, and share your own ideas in the MFT forum.  This month, we were asked the following questions:  

Show us how you store your ribbon.
What are your favorite types of ribbon?
Any tips or tricks on how to use ribbon on stamped creations?

I've taken off the past few months, not joining in on these creative chats.  I love looking into other crafters spaces, and I have gained a wealth of information from my fellow MFT DT members during these chats.

 I decided to join in this month, because it's no secret I ♥ RIBBON!!!  I admit it....I have an obbession with ribbon. Love it, can't have enough of it, and use it on almost EVERY card I create.  
Because of the amount of ribbon I own and how/where I purchase it from, I have quite a few different storage methods to share with you. I hope you'll find some of my storage methods helpful in your ribbon organization. 

Before I get into all of the storage pics, let me quick answer the other two questions of the day.....
My top picks for my fave types of ribbons to use are:
  • grosgrain-solid and saddle stitched
  • gingham (I really love the 3/4 inch width and the 7/8 inch)
  • twill ribbon
  • seam binding
  • twine-bakers twine and burlap twine
But I am open to using any type of ribbon....I'm really not THAT picky! lol!

As for how I use ribbon on my cards.....that's EASY....anyway you can! haha. I do love a great loopy bow! Add a button and some twine and it's even better :)

Soooooo, now Let me start with  my ribbon winding.  I LOVE these plastic spools, by Cropper Hopper.  I use the 3x3 size to wrap my ribbon that does not come on a spool.  The cool thing about this larger size, is they fit 2 side by side in the drawers I have for my storage units.  They are 6inch drawers.  Wrapping ribbon, might seem a little tedious and boring, but I do this task while watching TV with hubby at night.  He appreciates that I actually stay awake. lol!
 I am clearing out the drawer next to this one, to make room for all my LOVELY new MFT Grosgrain ribbon!!!!


Take a look at this ribbon heaven I received today in the mail. Ahhhh! You can check out all the new MFT ribbon HERE....and it coordinates with all the yummy new cardstock!

Go see....but come on back! I'll wait. 

Ok...glad you came back...here's a look at the ribbon cards without being wrapped.  This is the smaller size I use for my twine. 

Here is all my twine, wrapped and stored on a wire ring. 

Another of my favorite "ribbon" is my burlap twine.  LOVE this stuff.....love it! I store these wrapped around wooden spools. I stack them out in the open on a shelf, right at my finger tips. 
 Now on to some of the ways I store my actual ribbons. I am a HUGE fan of plain grosgrain and saddle stitched grosgrain ribbons.  While I love the pretty polka dots, other patterns, and ruffley ribbons, I always fall to this basic style of ribbon. I struggle with tying bows and have the patterns all lay the right way. The solid grosgrain is always easy to tie and make pretty bows with. SOoooooo happy Kim has started carrying this type of ribbon.

One way I store my grosgrain collection is on a paper towel holder. I took this idea from a Taste of Home catalog (I think. it might have been when they were Southern Living at Home).  It's an old paper towel holder. The top screws off, and I slide the spools over the rod.  I do have to use some scissors and make the cardboard spool hole a little bigger, so it can fit over the rod. 

Next up is my FAVE ribbon storage. One of my first trips to IKEA was to purchase these metal kitched rods (Bygel Rail) to hold my punches and then the cooridnating Bygel baskets I just love how the spools of ribbon sit right in front of me and are so easily accessible.

I have two of these baskets and as you can see they hold A LOT of ribbon. I have 15 spools in this one.

Before I send you on your way. I did want to show you one more way I store my ribbon. I adore the pretty seam binding ribbons.  I don't have a ton of it, and I even ae made my own (spritzing with Glimmer Mists).  I bought this particular ribbon and I just LOVE that they came wrapped all pretty on these shipping tags. Such an easy and econmical way to store ribbon.  So I kept them wrapped this way, and decided that this is at least how I'll continue to store my seam binding ribbons.


I sure hope you found my post informative and that you'll feel inspired to share your ribbon storage ideas, or incorporate at least some of my tips.


Visit Kim's Blog for a full list of designers that have taken up the challenge and get ready to delve into the minds of our creative team.


Pin It
Photobucket


Monday, February 27, 2012

Stamp of the Week-Unity


Sooooo....
have you jumped on the Stamp of the Week deal with Unity?
It's a GREAT program, guaranteed to bring you 
beautiful stamps every week. 

I don' t know about you, but I LOOOVE
my happy mail!
shhhh! I'm kind of addicted to getting things in the mail. 

You can read all about the 
Stamp of the Week 
HERE!
for now, I'll leave you with this beauty
from this week's SOTW!
Love Lives Here

Pin It


I just ADORE it!
it's by our own, Angie Blom!
Here's a close up.

AND it even come with a sweet, little
"I love you" sentiment.
I added it to a heart and created a charm
for my buttoney bow!


Sign up for Stamp of the week HERE!


Pin It
Photobucket

Saturday, February 25, 2012

MFT and Card Patterns


It's a BIG weekend for Kim and MFT.  It's the Grand Opening of the new Boutique in Florida. Have you seen the pictures on Facebook? It's gorgeous and sounds like it's going to be a fabulous day. I'm so excited for Kim and the MFT family.  Next time my family makes a trip to Disney, I'm thinking a side trip is in store for me. 
 
A great way to celebrate with Kim and My Favorite Things, no matter where you live, is to join Card Patterns this week. MFT is the sponsor. I played along and was super excited to FINALLY ink up the gorgeous Finishing Flourishes Stamp set. It just released in Feb. and it's been on my desk ever since.  I'm finding myself using it over and over again to fill little spaces on different projects. Love it.

Here I used it to fill big spaces. 


Here is a close up of the main image panel. I cut out a VERTICAL GREETINGS DIE-NAMICS and stamped two different sized flourishes in two, coordinating colors of ink. The Happy Birthday sentiment was then stamped over top with Brilliance Graphite ink. 
It is all finished off with some LEAFY FLOURISHES and a gorgeous, BOTANICAL BEAUTY DIE-NAMICS FLOWER. 

Here is the sketch from Card Patterns. 

We sure hope you'll play along.  It's fun and there's a prize up for grabs. You can read all about this week's challenge on the Card Patterns Blog.

Here are the Die-namics I used on today's card. 


Pin It
Photobucket

Thursday, February 23, 2012

Hip Hop...it's a Unity Thursday!


This week is flyin' by. 
That's what happens when Monday was a holiday.
I've got more new Unity to share today!
Have you checked out the new
Clever  Handmade co-brand?
LOVE it....fresh, new and so unique!

That's where this stamp comes from...
it's called She Always Knew


I used Jen's ASFYTT with this one.
 An extended MFT Mixed Banner 
and some new SU brads, finish off this cutie.
Here's a closer look. 


It's Hip Hop, so I'm sending you on your way. 
Thanks for joining me today. 

Robyn is up next!


Next Blog


Pin It

Photobucket